Saturday, May 11, 2013

Feed The Kitty Game

 
I recently purchased some shoes that came in this strange shoebox that opens on the side instead of the top. I started to throw it away. I normally save my shoeboxes for projects. But what on earth could I use this box for? I decided to turn to Pinterest for inspiration.

 
The original idea that I found was a game called "Feed The Penguin" at littlefamilyfun.com.
Dr. X is crazy about cats. So I decided to make a "Feed The Kitty" game. I wanted to make something that Dr. X and Super E could both do. That's a pretty tall order considering one is a preteen and the other is a toddler. But where there's a will, there's a way.
I started by cutting the top off of my box. Then, I wrapped it in orange construction paper.
I drew out my kitty in three different parts: back legs, body and front legs, and head. Click here for back legs template. Click here for body template. Click here for head template.
 
I cut out the different parts. I glued down the back legs first.
 
Next, I glued on the body.
Then, I glued on the head.
Once the glue was dry, I cut out the mouth with an X-acto knife. I cut out two white triangles for teeth and glued them to the inside of the box.
Every kitty needs a tail. I had an extra large pipe cleaner that was black and white. I painted it orange and poked one end through the back of the box.
I wasn't happy with the kitty's eyes. I decided to paint over the black lines. I ended up painting the whole kitty.
I drew up some fish on construction paper and cut them out. I laminated them with contact paper. Then I cut them out again. I have to admit, this was a tedious job. I was trying to save contact paper by cutting them out first and then laminating them. I'm cheap like that. I made four of each color of construction paper. Why four? It's just a nice, even number. I stuck a paper clip on each fish for a mouth. I cut a piece of yarn and glued one end to a wooden dowel and the other to a magnet.
 
 
And just to add a cute touch, I cut out a little worm and glued over the yarn and magnet.
Dr. X uses the coffee table as a boat.
I used wet erase markers (you could also use dry erase markers) to write math facts or vocabulary words on the fish.
 
Sometimes we just fish and call out answers. If correct, the fish can be fed to the kitty. If incorrect, the fish is thrown back.
 
We also play a game of Go Fish "literally". I write a fact on one fish and the answer on another until all of the fish have something on them. Each player gets 5 fish - face down. The remaining fish are placed face down on the floor. Each player checks their fish to see if they have any matches. Player one asks player two for a fish to match one they have in their hand. If player two doesn't have this fish then player one has to fish from the "pond". If they get a match, they get to go again. If not, it's player two's turn. Play continues until someone runs out of fish. This player is the winner.
The fishing game was a little advanced for Super E. But he will catch a few fish with my help. As we take them off of the fishing pole I tell him the color of the fish and let him feed it to the kitty. As he gets older we can do shapes, numbers, and letters.
 
I decided to make Super E some mice to feed the kitty. I used Pom Poms because they come in different colors. I glued on pieces of yarn for tales.
I only had white yarn, so I colored the tails with Sharpies to match the color of the mice. I was planning on using google eyes but didn't have any small enough. I ended up just painting black dots on for the eyes.
 
 
I gave Super E some tongs and showed him how to pick up the mice and feed them to kitty. He hasn't quite gotten the hang of this yet. He can do it with my help but, on his own, he prefers to use his hands. He thought feeding the kitty was so funny! Each time he picked up a new mouse I would tell him the color.

 
I decided to put the mice in a bowl and give Super E a spoon to feed the kitty. He loved this idea! He was much better with the spoon than he was with the tongs.
The game is a huge hit at our house for both young and older! Hope you have as much fun with this as we have!
 
I would love to hear from you and know how yours turns out.

Questions and comments are always welcome. You can also email me at adventuresofahomeschoolmama@gmail.com.

Thanks for stopping by! Please make sure to check back. I'm just getting started but I will be adding new stuff daily.


Wednesday, May 8, 2013

Recycled Recycle Bin

 
We live in my grandparents' old home. It's an old farm house that's over 100 years old. We are in the process of remodeling it. We've been in this process for the past 9 years now. There are still places that need molding and a few doors that need painting, among other things. We do a little here and there as we get the time and the money. My dad made our beautiful, handcrafted, oak cabinets - pro bono. God bless him! But he wasn't able to finish them, leaving us with no top cabinets and an unfinished edge by the fridge.
I've been trying to think of a way to hide this area because it is a bit of an eye sore.
 
I recently bought Super E a new basket ball goal. I had planned on saving the box for a later project so I slid it beside the fridge to get it out of the way until I had time to put it away. It was just the right width to fit perfectly between my unfinished cabinets and the fridge. Wouldn't it be nice If I could find a way to use this box to fill in this space? But what could I use it for?

We've been in need of an indoor recycle bin for our aluminum cans for quite some time now. We go through a lot of cans in our house... Well... I go through a lot of cans. What can I say? I have a soda drinking problem. And, yes, I know soft drinks are bad for me. I need to drink more water. I'm working on it.
 
This box would make a perfect makeshift recycle bin. I started by cutting the top flaps off of the box. I had just enough black spray paint to paint one side. This was the only side that would be showing so that worked out great!
There was a bad place at the top where a piece of tape had been. The trash bag covers that up nicely.
 
Dr. X collects signs and happened to have several recycle bin signs. I was able to talk him out of one - only because he had 3 more exactly like it. It gave our bin a nice finishing touch. If you don't have an avid sign collector in your house you could always print one from the internet and decoupage it on.
Voila! Much better than the ugly space that was here before. The best part... It was completely free to make. I had all of the materials that I needed right here. Yes, I love these kind of projects!
 
Questions and comments are always welcome. You can also email me at adventuresofahomeschoolmama@gmail.com
 
Thanks for stopping by! Please make sure to check back. I'm just getting started but I will be adding new stuff daily.


Attack Of The Juice Boxes

My own personal war:


  Is it just me or do these things go forth and multiply?

Monday, May 6, 2013

Our Lucky Day - Update

Well... Our Lucky Day clover experiment didn't work out at all like we had originally planned.

Click here to read more about Our Lucky Day clover experiment.

After doing a little research, I was under the impression that a clover clipping would not grow roots. Thinking that our original experiment was going to be a bust, the new plan was to dig up the actual plant that contained the four leaf clover, replant it and observe... We couldn't find one.

Really?! How do you find 7 four leaf clovers one day and then none the next? We were starting to feel not so lucky.

But wait! What is that in the bottom of our vase of clovers?
Roots! Guess it's our lucky day after all! I think we might have given up on this experiment a little prematurely. Now, that's not saying that we can get these clovers to actually grow. But we definitely were able to get them to grow some roots.
Four out of the seven clovers grew roots. Time to plant them and hope for the best.
Will our luck continue?... Stay tuned to see what develops.


Questions and comments are always welcome. You can also email me at adventuresofahomeschoolmama@gmail.com.


Thanks for stopping by! Please make sure to check back. I'm just getting started but I will be adding new stuff daily.


Friday, May 3, 2013

Oh No

Super E has been having a hard time learning how to talk. We have been working with therapists trying to teach him how to use sign language, choice boards and picture schedules. So you can imagine our excitement when Super E uttered his first "real" word. Finally! We have true communication going on here. But out of all of the words in the English language it had to be no. And boy does he LOVE to use his new skill!


Thursday, May 2, 2013

Organizationally Challenged - Part 2

Most lesson planners are just not flexible enough for me. I hate using the "daily planning" method. I always end up writing out detailed lesson plans only to find our studies leading us in an entirely different direction. When a child's interests lead you in another direction, I think that it's a good idea to follow. I mean, don't get me wrong, we do have structure. There are things that kids need to learn that they might not be truly excited about. Still, I think it's important to follow their interests as much as possible. There has to be room for both. But in doing that, sometimes we are led off of the beaten path. If I have my lessons all planned out for each day, this throws them off BIG time. We'll have to do what I had planned for Tuesday on Wednesday. And then Wednesday's work has to be done on Thursday. But then we decide to do something else and we're another day off of schedule. This leaves me feeling lost, behind, and frustrated.

I decided that I needed to create a lesson planner that is easier for me to keep up with and a lot more flexible. I have included a space for grades to eliminate extra paper work. The less that I have to keep track of, the better. Click on the following links to download my free lesson planning templates.

Math Lesson Plans

Science Lesson Plans

Bible Lesson Plans

Language Arts Lesson Plans

Geography Lesson Plans

History Lesson Plans

Toddler/Preschool Lesson Plans

Blank (Any Subject) Lesson Plans

Blank (Any Subject) Lesson Plans in MS Word Format/ Customizable


I write out the lessons that I plan for us to do in the order that I think we will do them. As we complete each lesson, I mark the date it is completed along with a check mark or a number grade. If we do something that I hadn't planned on - No big deal. I simply add it to the bottom of the list and write in the date. I can do the lessons in any order that I choose and it all works out. I don't feel like I'm falling behind every time we get off schedule. It saves me so much frustration!

Super E's plans are a little different. He obviously doesn't receive a grade for the activities that he does. But I do like to keep track of the areas that we need to work on as well as the activities that he really enjoys. Our "Fun Factor" scale works like this:

*:) happy = Super E loves this activity

*:( sad = We didn't like this activity

W = Activity that we need to work on

TA = Too advanced

I keep everything in a three ring binder. The first two pages of my binder are Dates to Remember and Book List.
 
Dates to Remember is for recording dates to later transfer to my Sticky Note Wall Calender/Planner. The wall planner is great because it is right there - out in the open for me to see. But it's not portable and it's not always available when I need to record a date. Having the Dates to Remember page in my lesson planner helps me to keep all of my dates together in one place until I can write them on the calender. This way, I don't lose them or forget to record them.
 
The Book List page helps me to keep track of books that I need for future lessons. If I see a book that I would like to use, I write it down on my list. Then I can look for it at the library or book store. Once I have the book, I check it off.
 
I have a separate tab for each subject that we study. Under each tab I include my lesson plans for that subject followed by a week or two of worksheets, printouts, and notes for the lessons. All other materials are kept in a separate binder until needed.
 
Don't forget to check out my Freebies/Printables page for other great printables.
 
Questions and comments are always welcome. You can also email me at adventuresofahomeschoolmama@gmail.com.
 
Thanks for stopping by! Please make sure to check back. I'm just getting started but I will be adding new stuff daily.


Wednesday, May 1, 2013

Organizationally Challenged

I have to admit... I am organizationally challenged. While I do understand the concept behind planning, I simply have trouble with the execution.

I have tried every type of planner and organizer I can find but still find myself struggling to keep it together.

I have come to the conclusion that the people who are designing these planners are very organized themselves. I need an organizer  that is designed for the organizationally inept. I need something super simple that's not complicated to follow. I don't need to record every detail of my day. If I do, I forget to look at what I have written down. So I end up not doing half or even a third of what I had "planned" on doing. And then I feel guilty for not "staying on task". It's a vicious cycle!

But I do understand that planning is important. "He who fails to plan is planning to fail" - Winston Churchill

So I decided to design my own planner. I wanted it as simple as possible. My biggest problem is that I tend to not check my planner after I have done the planning. So I decided that I needed to make something that I would be sure to see.
And the Wall Planner was born!
 
I painted a sheet of poster board red. You could simply use colored poster board and skip this step. I wanted a red background and I didn't have any red poster board... so, time to break out the paint.
 
Then I used sticky notes to make the calender. I recommend that you use the ones that say "super sticky". They are a little more expensive than the generic ones but, unless you want the days falling off of your calender, they are a much better choice.
 
If you wanted to get really organized, you could use a different color of sticky note for each member of the family. Stick them right on top of each other. I, myself,  have no desire to be that organized. But sometimes I do stick multiple sticky notes for a day that I need extra writing space.
I used foam letters to add the days of the week across the top.
Long sticky notes worked great for my extra planning section. I had just enough room to stick a row of these down the side.
I use the top one to record library books and due dates. I hate paying library fines. I mean, you might as well just buy the book! I also write the due dates onto the calender to make sure I don't overlook them. Trust me, I need all of the help that I can get when it comes to remembering stuff.  
 
I use the second one for notes.
 
The last one is for upcoming events - not in the current month.
 
The great thing about sticky notes is that if you need more room you can always stick another one on top. They're stackable!
 
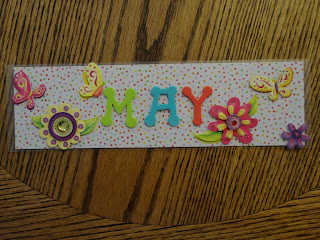
I wanted to reuse the same sheet of poster board for each month, so I laminated (contact paper) the month labels and used velcro to stick them to the calender. So, for each month, I can simply pull off the old month and put on the new one.

I laminated a strip of scrapbook paper and then I stuck 3D stickers (Dollar Store) on top of the laminated strip.

 
I stuck it to the wall using mounting putty. You can find it on the office supply isle. It reminds me of chewed, chewing gum. But it's really easy to use and it's removable/repositionable. You could also use Command strips - LOVE them.
 
I do still use a three ring binder for my lesson plans. I will post my lesson planning printables and ideas later on.
 
Questions and comments are always welcome. You can also email me at adventuresofahomeschoolmama@gmail.com.
 
Thanks for stopping by! Please make sure to check back. I'm just getting started but I will be adding new stuff daily.